
Key takeaways: Almost every modern enclosed CoreXY 3D printer runs on a single 24V DC rail, and the load is dominated by the heated bed. Get the bed wattage right, add a safety margin for the hotend and steppers, derate for ambient chamber temperature, and you have your power supply rating. The two numbers that cover 95% of FDM machines are 350W (single 200×200 or 220×220 build plate, no chamber heater) and 500W (300×300 plate, AC-switched bed, or active chamber heating). The decisions that catch people out aren't the wattage — they're the inrush current at cold start, the derating curve once the chamber climbs past 50°C, and the cable gauge from PSU to printer controller.
TL;DR: For a 235×235 or smaller bed without chamber heating, a 24V 350W industrial enclosed PSU is enough. Move to 24V 500W or 600W if the bed is 300×300+, if you run an AC-mains bed switched by SSR, if you add a chamber heater, or if the printer is enclosed and the PSU shares chamber air above 40°C. Always size at no more than 80% continuous load and verify the spec sheet quotes real continuous wattage, not peak.
Why 24V Won the FDM Printer Power War
A decade ago, 12V was the default for hobby 3D printers — the legacy of ATX scrap power supplies pulled from old desktops. In 2026, every serious printer ships with 24V as the standard rail, and there is one decisive reason: the heated bed.
A 220×220 mm aluminum bed needs roughly 120–150 W to climb from 25°C to 60°C in under five minutes. At 12V that means 10–12.5 A through the bed wiring, the controller MOSFET, and the connectors. At 24V the same wattage runs at 5–6 A — half the current, a quarter of the resistive heat in the wires and connectors, and four times the headroom before a MOSFET browns out. Bambu Lab, Prusa Research, Voron Design, Creality, and Anycubic all moved their flagship lines to 24V for exactly this reason.
If you are repowering an old MK3S or a Creality Ender 3 V2 that was originally 12V, that conversion is more than a PSU swap — the bed heater, hotend cartridge, and steppers all need to match the new rail voltage. For new builds and modern printer upgrades, always start with a 24V PSU.
The Wattage Budget: What Actually Draws Power
A modern 24V CoreXY printer pulls power from five places. Memorize this stack — it is the entire sizing exercise.
| Load | Typical Wattage | Notes |
|---|---|---|
| Heated bed | 120 W (220×220) — 350 W (300×300) | Dominant load. Runs 100% during heat-up, ~30% PWM at steady state. |
| Hotend | 40 W (single) — 80 W (volcano/CHT) | Runs ~10–30% PWM at steady state. Spikes 100% on layer-change recovery. |
| Steppers (×4) | 4 × 6–10 W = 25–40 W | Roughly constant during print. TMC drivers add ~3 W. |
| Electronics | 5–10 W | MCU board, MCU fan, optional Raspberry Pi / SBC, LCD. |
| Part / hotend fans | 5–10 W | Negligible until you add a chamber blower. |
| Chamber heater (optional) | 200–400 W | Only present on ASA/PC/PEEK-capable enclosed printers. |
The Honest Heat-Up Number
The wattage that matters for PSU sizing is the peak continuous draw, which happens during the first 60–120 seconds of a print when the bed and hotend are both heating from cold:
Peak = Bed (100%) + Hotend (100%) + Steppers (idle) + Electronics + Fans
After bed and hotend reach setpoint, total draw drops to roughly 40–50% of peak. So the PSU has to handle peak continuously for the first two minutes, not a millisecond inrush. That rules out PSUs whose "peak power" rating depends on a 10-second window.
Worked Examples: Common Modern Printers
Voron 2.4 350mm (300×300 bed, no chamber heater)
- Bed: 350 W (24V mains-DC bed) — but the typical Voron 2.4 community build uses an AC-mains 750W silicone heater on the bed driven through an SSR, not loaded on the 24V PSU.
- Hotend: 60 W (Revo HF / volcano)
- Steppers (4 × NEMA17 + extruder): 35 W
- Electronics + Pi: 10 W
- Fans (part, hotend, electronics): 8 W
- 24V PSU load: ~115 W during print, ~120 W peak
A 24V 200W PSU is enough for this configuration, but most Voron builders standardize on 24V 350W for headroom and to handle accessory loads (LED lighting, exhaust fan, electronics-bay cooling). If the bed is wired to 24V DC instead of mains-AC, jump straight to 500W.
Prusa MK4 / MK4S (250×210 bed, 24V DC bed)
- Bed: 240 W peak
- Hotend (Revo Nextruder): 40 W
- Steppers: 30 W
- Electronics + LCD: 8 W
- Peak: ~320 W → 24V 350W PSU minimum, 500W recommended for headroom
This is the printer that most often gets undersized on community PSU swaps. A 240W bed plus a 40W hotend plus everything else lands you within 10% of a 350W PSU's nameplate — which violates the 80% loading rule and shortens PSU life. Step up to 24V 500W.
Bambu Lab X1C / P1S (256×256 bed, enclosed)
The X1C and P1S use a proprietary 24V power supply integrated into the printer, but if you are repowering one or building a clone, the budget is roughly:
- Bed: 220 W
- Hotend: 48 W
- Steppers: 35 W
- Chamber circulation fan: 6 W
- Electronics + AMS interface: 12 W
- Peak: ~320 W → 24V 350W minimum
If the printer is going to live in a heated workshop in summer with ambient above 35°C, 24V 500W with airflow becomes the safer choice because the PSU itself derates with chamber temperature.
DIY Large-Format Build (400×400 bed + chamber heater)
- Bed: AC mains via SSR (not on 24V PSU)
- Hotend (high-flow CHT): 80 W
- Steppers (6 × NEMA17, larger machine): 50 W
- Chamber heater (24V, PTC element): 250 W
- Electronics + SBC + camera: 15 W
- Peak on 24V rail: ~400 W → 24V 500W or 600W PSU required
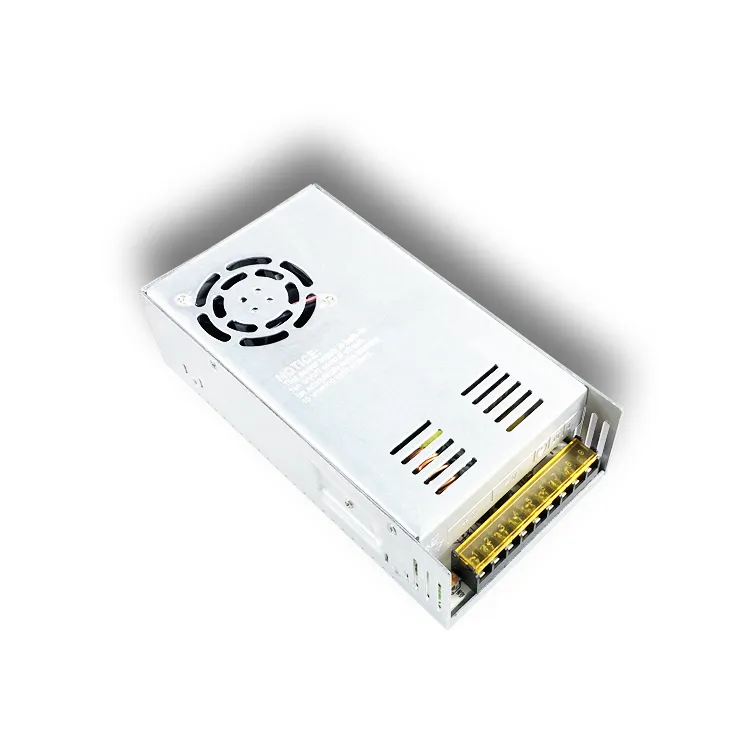
For machines with active chamber heating on the 24V rail, the SD-500W 24V industrial switching PSU is sized for sustained full-load operation and is the kind of part you want in this build.
 SZ Series 24V 240W / 300W / 360W / 480W enclosed PSU — covers most modern enclosed CoreXY printer builds
The 80% Loading Rule (and Why It Matters for Printers)
Pick a PSU whose continuous nameplate wattage is at least 1.25× the calculated peak draw. This is the same thermal headroom rule we use for industrial switching supplies in any always-on application — it is not marketing.
A printer is a uniquely punishing load profile for a power supply because:
- Cold-start spikes. The first 90 seconds run the PSU at 100% rated load. Anything above 90% nameplate accelerates capacitor aging.
- Long print cycles. A 24-hour print runs the PSU continuously. Marginal cooling that survives a 4-hour print can fail at 18 hours.
- Enclosed printers self-heat. A printer chamber at 50–60°C is also the ambient temperature for the PSU, which now sees its derating curve kick in.
A 320 W peak printer load on a 350 W PSU is 91% loaded — too tight. The same load on a 500 W PSU is 64% loaded — comfortable, runs cooler, lasts longer.
Ambient Derating: The Hidden Sizing Factor
Industrial enclosed power supplies are rated at 25°C ambient. Above 50°C, most quality 24V PSUs derate linearly at 2–3% of nameplate per °C. For an enclosed printer at 55°C chamber temp, a "500W" PSU may only deliver 425–450 W continuously.
Effective wattage = Nameplate × (1 – 0.025 × (Tambient – 50)) above 50°C ambient
For ASA, PC, or PEEK printing where the chamber actively runs at 60°C, always step up one PSU size beyond the cold-ambient calculation. The full derating curve story — temperature, altitude, and the difference between convection and forced-air cooling — is covered in our power supply derating curve guide.
Inrush Current: Why a 350W PSU Pops Breakers
A 24V switching power supply does not draw a smooth 1.5 A from a 230V wall outlet at boot. The bulk capacitors charge through a peak inrush of 20–40 A for 5–20 milliseconds. That spike can trip Type-B residential breakers when several printers share one circuit, or when a PSU is hot-swapped after a brief AC interruption.
Quality industrial PSUs include an NTC thermistor or active inrush limiter to bound the spike to roughly 25 A peak. If you are wiring multiple 24V printer PSUs to one branch circuit, look for this on the spec sheet — many cheap 12V/24V bricks omit the limiter and rely on the building's slow breaker characteristic, which is not a safe assumption. Our power supply inrush current limiting guide covers the topology choices and the test methods that distinguish a real limiter from a marketing claim.
Cable Gauge from PSU to Controller
The DC cable from PSU output to the 3D printer mainboard is the place where bad upgrades fail. A common mistake is reusing the thin 22 AWG cable from a 200W PSU when you upgrade to a 500W unit. The math:
| 24V DC Current | Minimum Cable | Voltage Drop at 0.5 m |
|---|---|---|
| 10 A (240W) | 18 AWG | 0.10 V (0.4%) |
| 15 A (360W) | 16 AWG | 0.12 V (0.5%) |
| 20 A (480W) | 14 AWG | 0.13 V (0.5%) |
| 25 A (600W) | 12 AWG | 0.13 V (0.5%) |
For 350W+ printer builds, run 14 AWG silicone-jacketed cable from PSU output to the mainboard's V+ and V– terminals. Use crimped ferrules on both ends, torque the PSU terminal screws to manufacturer spec, and recheck them after the first week of operation — vibration and thermal cycling loosen them.
Picking the Right Sanyi PSU for Your Printer
For most 235×235 single-extruder enclosed builds: SFY-Z 240W or SZ 360W at 24V output. Aluminum housing, terminal-block wiring, full overcurrent / overvoltage / over-temperature protection, MTBF > 50,000 hours.
For 300×300 build plates, AC-bed printers with accessory loads on the 24V rail, or hot-ambient workshops: SZ Series 480W 24V — cabinet-style mounting fits standard printer electronics bays, built-in fan handles continuous full-load duty.
For DIY large-format printers and chamber-heated builds: SD-500W 24V ultra high-power PSU — designed for sustained full-load operation in industrial environments.
All three families ship with CE, ROHS, and 3C certifications and quote continuous rated power, not peak.
Frequently Asked Questions
1. Can I use one 24V 500W PSU to power two 3D printers?
Technically yes if the total peak load stays under 80% of nameplate. Practically no — when both printers cold-start at the same time the combined inrush trips the PSU's protection or overloads the rail momentarily, which can corrupt a print in progress. Use one PSU per printer. The cost difference is small and the failure modes are independent.
2. Is a 12V 350W ATX power supply okay for an old 12V printer?
If the original printer was designed for 12V, an ATX PSU works mechanically, but it has two real disadvantages: most ATX rails are split across +12V1 / +12V2, and the printer's bed and hotend combined can exceed the per-rail current limit (typically 18 A each). Use a dedicated single-rail 12V LED driver or industrial PSU instead, or convert the printer to 24V if the bed heater rating allows.
3. Why does my new PSU run hot to the touch even when the printer is idle?
That is normal. A switching PSU at no-load still dissipates 5–8 W in the standby control loop and bulk capacitors — enough to make the metal housing feel warm. Hot enough to be uncomfortable to hold (above ~55°C) at no-load is not normal and usually indicates a fan failure, a marginal capacitor, or that the PSU is mounted in a cavity without convection.
4. Does it matter if the PSU is rated 480W vs 500W vs 600W?
For an FDM printer drawing 320 W peak, the difference between 480W and 600W is irrelevant performance-wise — all three are well above the 80% rule. Pick on form factor, fan noise level, cable length, and warranty terms. A 600W PSU with a fan that idles below 30 dBA is more useful than the same wattage with a fan that ramps to 50 dBA at 50% load.
5. What is the typical service life of a 3D printer power supply?
A quality 24V industrial switching PSU is rated for 50,000–100,000 hours MTBF at 25°C and 70% loading. In real-world printer service — 40–50°C electronics bay temp, 50–70% average loading, daily thermal cycling — expect 5–8 years before output capacitors begin to age and the rail voltage starts sagging under load. Replace at the first sign of bed temperature instability or stepper missed-step events that aren't otherwise explainable.
6. Can the PSU be mounted inside a heated enclosure?
No. The PSU should always live outside the heated chamber, mounted in the electronics bay that breathes cool ambient air. If your enclosure design puts the PSU in the heated zone, add a vented electronics compartment with its own exhaust fan, or move the PSU to the underside of the machine.
Related Reading
- Open-frame vs enclosed power supply selection guide — for sizing the form factor to your printer's electronics bay
- Power supply derating curve guide — for hot-ambient and chamber-heated machines
- Industrial power supply inrush current limiting guide — for multi-printer farm wiring
- 24V vs 48V industrial DC power supply comparison — relevant if you are building an industrial-class large-format printer
Need a 24V PSU Sized to Your Printer?
Sanyi manufactures 24V industrial switching power supplies from 60W desktop adapter form factors up to 720W enclosed cabinet units, all certified to CE, ROHS, and 3C, and rated for continuous full-load duty. Whether you are spec'ing a single Voron 2.4 build, repowering a print farm of 30 Bambu-class machines, or designing a large-format DIY CoreXY, our application engineers can match the right form factor and protection profile to your build. Contact our power engineering team for a sizing review, sample requests, and bulk pricing on 100+ unit orders.